Koha is a Library Management System used worldwide by approximately 15,000 libraries. The Koha team at Catalyst are passionate about using Koha and helping libraries (big and small!) get the most out of their Koha LMS.
On 22nd March Whanganui Libraries hosted the 2018 New Zealand Koha User Group day. This event took full advantage of the wealth of Koha knowledge brought together in one room, by running sessions ranging from Q & A to U.X./design enhancement and bug fixing to consortium history sessions. In the first instalment of our ‘Koha Tips & Tricks’ series, here are a few questions that came up and the learnings over the user group day.
1. How do I add or modify text and styling on the Koha OPAC main page?
The OPAC (Online Public Access Catalog) is the publicly accessible interface of Koha. If you want to have a very swish looking OPAC, you may wish to have a designer/programmer set this up for you, but you could try some parts out for yourself too. As well as being styleable, the OPAC main page can have custom content added to it which is something someone with a basic knowledge of HTML code can do, here’s how:
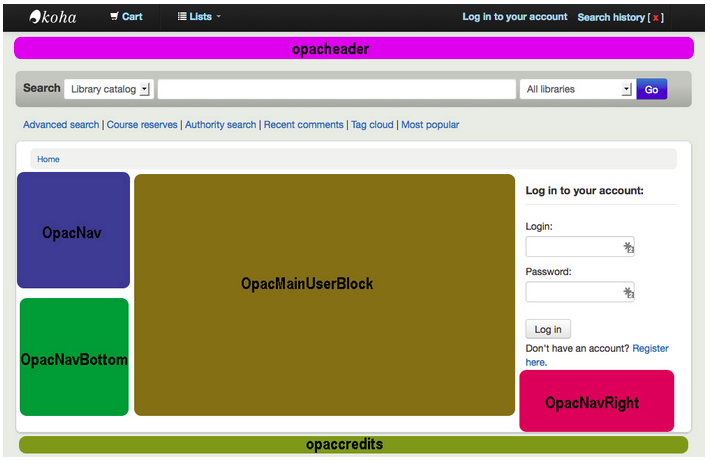
System preferences are configurable settings that control how Koha works, if you don’t know the code you need you could take a look at this list of code examples to pick a change you would like to see. The below diagram illustrates which system preferences edit each region of the OPAC main page.
Sign in to your Koha intranet
Go to Administration->Global system preferences->OPAC
Scroll down to find your chosen system preference or you can search for the system preference in the search box at the top of the page.
Put your HTML code (found from a website as above if you don’t know it) into the system preference to add content to its OPAC region
Save your changes
For a more detailed explanation of each system preference go to the OPAC Configuration section of the Koha manual.

2. How do I get a new language added to the OPAC and staff client of my Koha (eg Te reo Māori)
Once you have had a developer install the language package to your Koha instance, you will need to follow a few steps to turn it on:
- Go to Administration, click ‘System preferences’
- Click the I18N/L10N tab on the left hand side, down a bit in the list
- Look for the preference OPACLanguages and tick the box next to Te reo Māori. Do the same for the language preference.
- Look for the preference opaclanguagesdisplay, and set this to Allow.
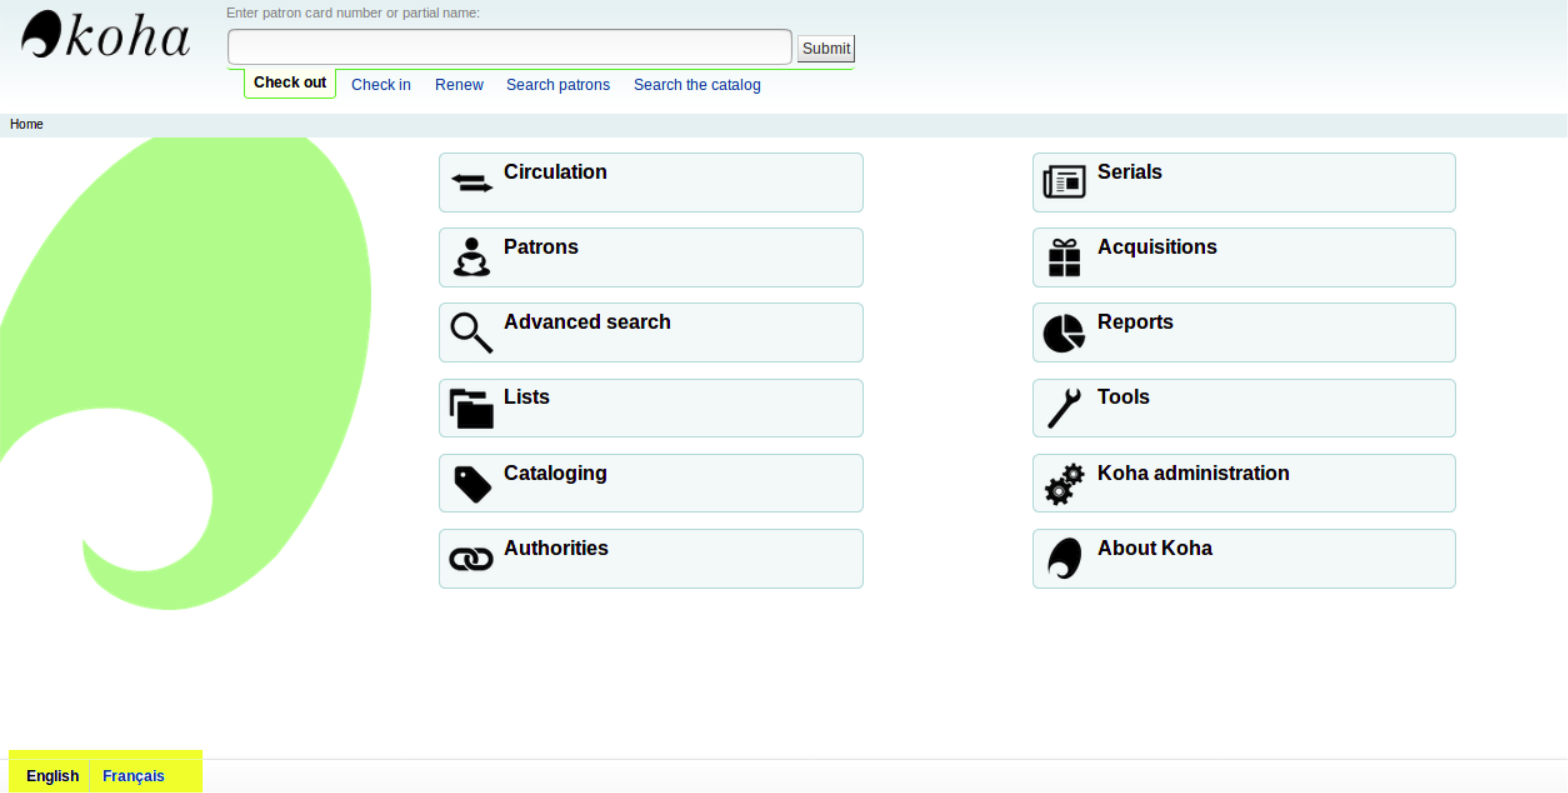
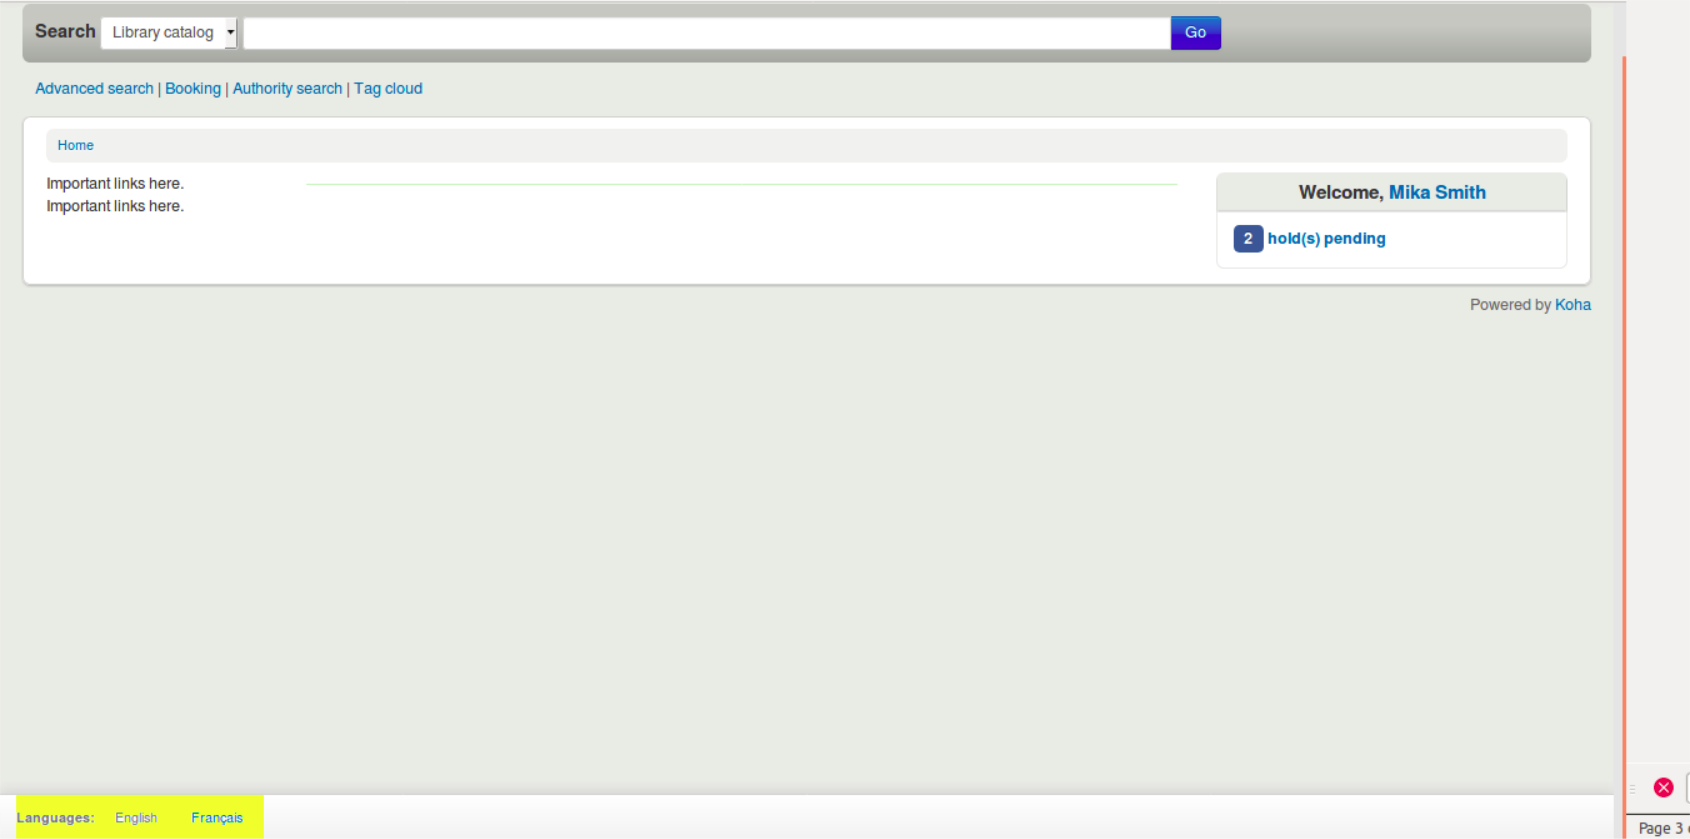
Your users should now be able to switch between English and Māori on both the OPAC and staff client. The switcher button will turn up at the very bottom of the page as highlighted below.
Staff client
OPAC
3. How can library staff and patrons who don’t know how to code still contribute to the Koha project?
Knowing your work is included in a worldwide project being used by thousands of libraries is a very motivating and exciting prospect. A good way for engaging library patrons is for them to contribute to the Koha translation project, where they can translate English content on Koha pages to whichever language they are experts in. Once translated text is submitted to the project, it will be pushed upstream and integrated into Koha, so libraries that update to new versions will show your personal work in their live Koha system!
Here’s how:
1. Log in to Koha Translation Project
- http://translate.koha-community.org/ sign up as a new user
- check your email and click on the link sent to you to verify your new account
- You are now a member of the Koha Translation Project and should now see a screen similar to the one shown below:
2. Select a Koha version or manual link (highlighted)
3. Select which non-english language link you want to translate to, for example Turkish.
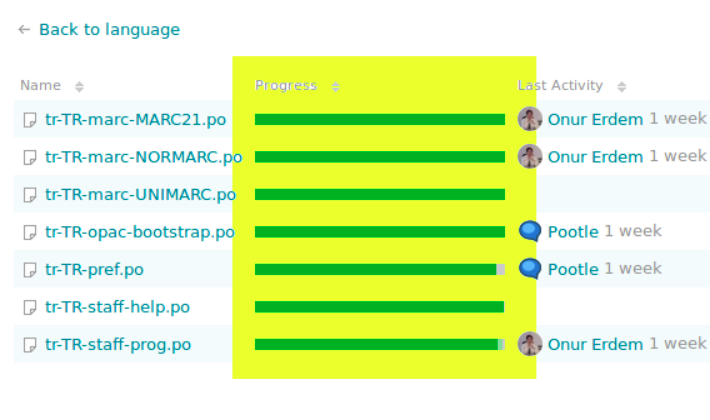
4. A list of files with completion progress bars is displayed. Hover over the progress bars to learn what percentage complete they are and select a file to translate which is less than 100% complete, i.e. the green colour is not spanning the whole progress bar.
5. Scroll down and click on the ‘Continue translation’ link (highlighted in the below screenshot)
6.
Translate the English text after the final hash # symbol.
This means translate the text including the code tag (which in the below screenshot is <br>) to your selected language, which in this case is Turkish. Please note in the below screenshot highlighted in yellow the English text to be translated. Write the Turkish translation in the input box
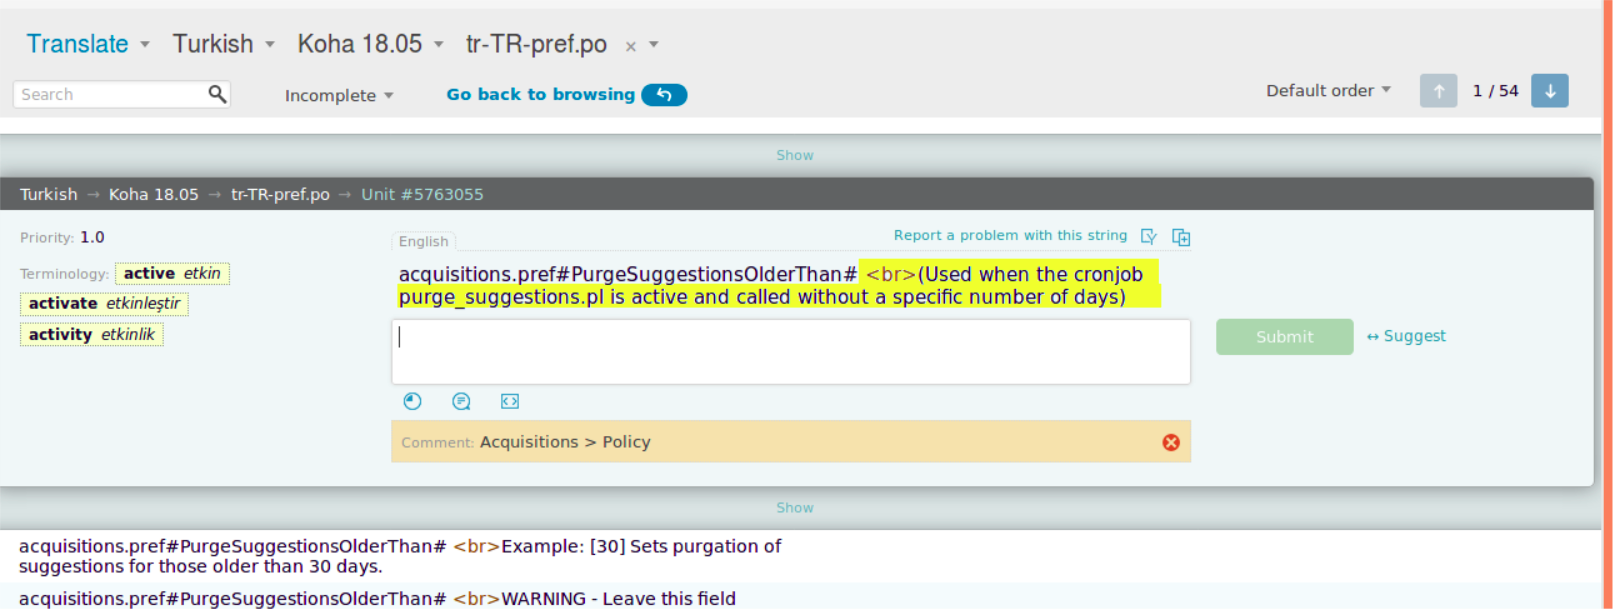
7. Select the ‘Submit’ button
You have now submitted a translation to the Koha translation project!
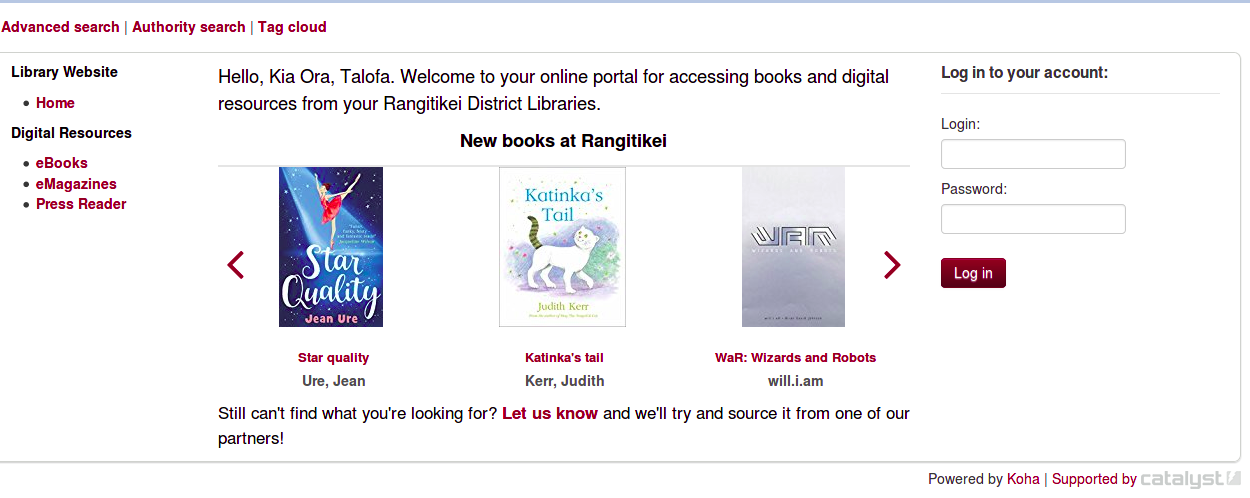
4. I’ve heard people talking about a ‘carousel’ what is it and what can it do?
A carousel is a very cool moving display that slides side-to-side, showing the cover images of your library’s newly added catalogue items. Here is an example from Rangitikei Libraries, you can have a play on the live version here.
A carousel is something that you will need to have a developer install and configure for you, but you will be able to make the following decisions about the functioning and look of your carousel as these settings are configurable:
-Number of cover images displayed
-Speed of the carousel automatic slideshow
-Whether you want arrows on the left and right of the carousel so that users can skip through the carousel faster than the automatic speed
-Size of the cover images in the carousel
-Whether you want the carousel to play automatically
-How often the carousel updates with the newly added items.
Click here for the next post in Alex’s series: Koha tips and tricks 2

Catalyst Koha
If you have any questions or comments about this blog post, or would like some support with your Koha instance you are welcome to email us at koha@catalyst.net.nz
Follow Catalyst Koha on Twitter!